
Work Orders on Cummins INSITE Software (CUMMINS Engines)
Work Orders
#Work Orders – About
Work Orders are used to record and view information about the ECM history enabling technicians to reference previous ECM settings. Work Orders contain one or more images that contain a snapshot of all INSITE™ accessible data.
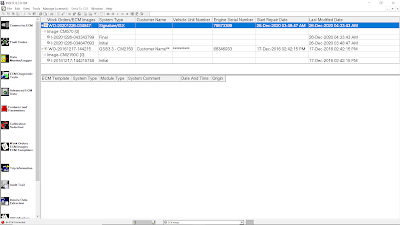
The Work Orders window is used to manage Work Orders, Images and Templates. The Work Order window has an upper and lower section. The upper section shows Work Orders and summary information. The lower section shows Templates.
Select Work Orders from the Viewbar (refer to Figure 1.1 above) to open the Work Orders window. When connected to an ECM or Simulator, INSITE™ will only display the work orders and images associated with that specific Engine Serial Number and it will only show Templates for that ECM type. If not connected, all Work Orders and Templates will be displayed.
Work Orders are initially sorted by the Last Modified Date, with the most recent Work Orders at the top. The list may be resorted by the values in any of the columns. To resort either list, click on the column header. The table will be resorted based on the selected column in ascending order. Click on the column header again to resort the table again in descending order. Columns may be moved by selecting the column header and dragging it to the desired location.
INSITE™ can be configured to automatically start the Work Order creation process when connecting to an ECM or Simulator by enabling the Work Order Mode. Work Order Mode will also start the image creation process before disconnecting from an ECM or Simulator. The Work Order creation will be started automatically but it can be cancelled if Work Order is not desired. Perform the following steps to enable or disable Work Order Mode:
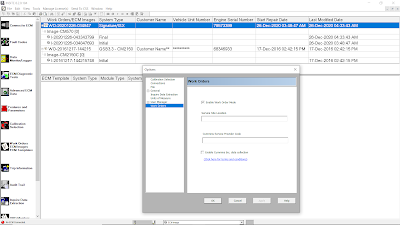
a). Select Tools > Options from the Menu Bar.
b). When the Options window appears, select Work Orders from the left side of the screen.
c). When the Work Order screen is displayed, select or deselect the Enable Work Order Mode check box as desired.
d). Enter a Service Site Location.
e). Select OK to close the window.
#Work Orders – Parameters
The upper section of the Work Orders window contains a table that displays summary information that was recorded when the Work Orders and Images were created. The table has seven columns, explained below, and one row for each Work Order (refer to Figure 1.1 above).
1.Work Orders/ECM Images – This column displays the Work Order Name. When creating a Work Order, a default name is provided, but it can be changed if desired. The default name is “WO-” followed by the year, month, day, hour, minute, and second the work order was created. (Example: WO-20201226-034847 was created on December 26th, 2020 at 03:48:47 am).
2.System Type – This column displays the system type obtained from the ECM.
3.Customer Name – This column displays the Customer Name retrieved from the System ID and Dataplate.
4.Vehicle Unit Number – This column displays the Vehicle Unit Number retrieved from the System ID and Dataplate.
5.Engine Serial Number – This column displays the Engine Serial Number retrieved from the System ID and Dataplate.
6.Start Repair Date – This column displays the date and time that the first image was created in the work order.
7.Last Modified Date – This column displays the date and time that the most recent image was created in the work order.
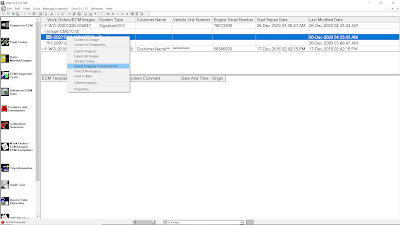
#Work Orders – Right Click Menu
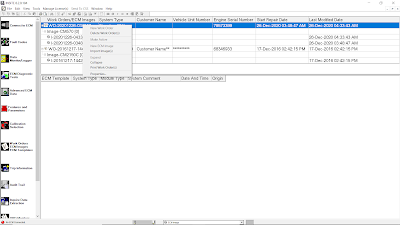
1.New Work Order – Select this option to open the Work Order wizard and create a new work order.
2.Delete Work Order(s) – Select this option to delete all data records associated with the selected work order(s).
3.Make Active – Select this option to activate a work order other than the current work order. When new Images are created, they are attached to the active Work Order.
4.New ECM Image – Select this option to create an ECM image of the selected work order.
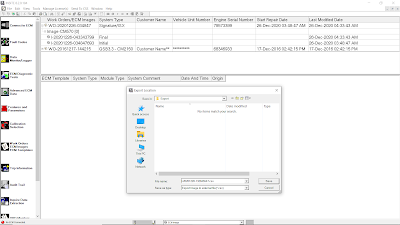
5.Import Image(s) – Select this option to import a saved image file into the Work Orders window. Read More: ECM Images on Cummins INSITE Software (CUMMINS Engines).
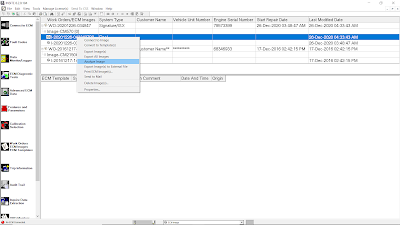
6.Expand – Select this option to expand the selected work order to view its associated ECM images. Work Orders may also be expanded by selecting the icon to the left of the Work Order name.
7.Collapse – Select this option to collapse the selected work order, hiding its associated ECM images. Work Orders may also be collapsed by selecting the icon to the left of the Work Order name.
8.Print Work Order(s) – Select this option to print one or more work orders.
9.Properties – Select this option to view details about the Work Order. These details were created or edited when the Work Order was created or modified. Unlocked fields may be edited by double-clicking in the edit box and typing new data. Information may be added to the Technician’s Notes by clicking inside the box.
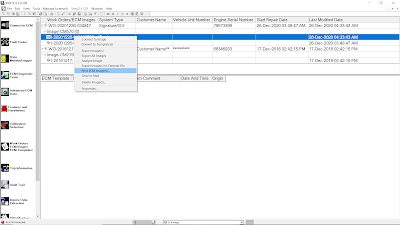
#Print ECM Image(s)
Select this option to print selected images. Multiple images can be printed by holding the Ctrl key while selecting the images to be printed. When printing multiple images, the print procedure will be performed for each image.
a). A Print ECM Images window will appear. All Features will be selected for printing and will appear in the right-hand window.
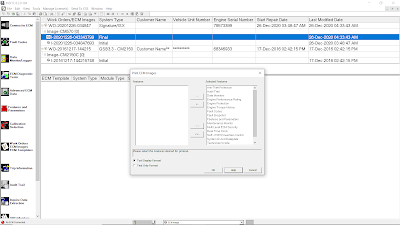
b). Add or Remove individual features to or from the Selected Features list by selecting the feature and then selecting the “-<” and “>-” buttons.
c). Add or Remove all features to or from the Selected Features list by selecting the “<<-” and “>>-” buttons.
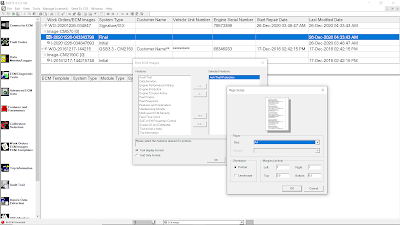
d). Choose Tool Display Format or Text Only Format by selecting the appropriate radio button. Tool Display Format prints the data as displayed in INSITE™. Text Only Format prints the data in table format.
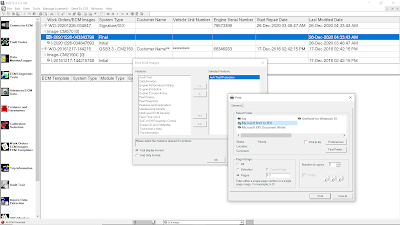
e). Select OK, and then proceed through the print wizard steps. Download here for example (Tool Display Format): ECM Images CM570 Final.pdf
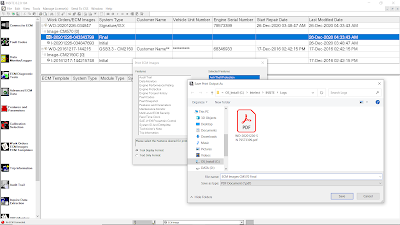
#Export Image(s) to External File
Select this option to export selected Images to a Comma Separated Values file (.csv) or Text (.txt). An Export Location window will appear. Select the desired file location and edit the file name, if desired. The default name “I-” is followed by the year, month, day, hour, minute, and second the work order was created. The file may be viewed using third party software applications including “Microsoft Excel”. Comma Separated Values and Text files cannot be imported back into INSITE™.
#Analyze Image
Select this option to using Image Analyzer for each Parameters, and Export the Features.

Leave a Reply