The GM MDI II is capable of communicating on your workshop network over Wireless. The Network Setup tab in the MDI Manager software provides a number of functions used to select and configure the MDI 2network connection interfaces including wireless access and security settings.
You must be connected to the MDI 2via USB to access the settings on the Network Setup tab. If you are not connected via USB, the controls on the Network Setup tab are disabled.
The MDI 2supports two methods for wireless communication. With the Access Point Wireless Communication method the MDI 2connects to your PC through an access point in your workshop. With the Point-to-Point Wireless Communication method the MDI 2connects to your PC directly using a USB wireless adapter. Each of these methods are described in the following sections.
Enabling Access Point Wireless Communication
Your MDI 2can be configured for Access Point Wireless Communication. Before starting, you need to know the following:
1.An IP Address and Subnet Mask to assign to your MDI 2 (if your LAN does not automatically assign IP addresses)
2.Wireless communication access point SSID (network name)
3.Wireless security password (encryption key)
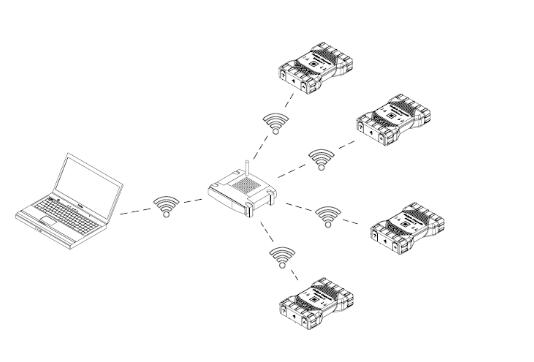
4.The illustration below shows several MDI 2s connected to a single laptop PC using a wireless access point.
Use the following procedure to configure your MDI 2 for wireless communication in your environment. Before modifying the MDI 2 communications interface, contact your IT Administrator.
1.Start the MDI Manager software by clicking on the MDI Manager icon.
2.Plug the MDI 2 into external 12v power.
3.Plug the USB cable into the PC and MDI 2 and allow the MDI 2 to boot completely.
4.Select and Connect to your MDI 2 in the MDI Manager software MDI 2 Explorer tab.
5.Select the Network Setup tab.
6.From the Wireless tab, select the Enable Wireless Interface check box in the Interface Control section. Once you enable the interface, the IP Address Configuration box and the Apply and Cancel buttons become active.
7.Select Obtain an IP address automatically if your LAN automatically assigns IP addresses. Otherwise enter the assigned IP Address and Subnet mask given to you by your IT Administrator.
8.Select Access Point to begin wireless access point configuration.
9.Specify the network name:a.If your access point usesa hidden SSID or if you are not within range of the access point you will select the Enter Network Name [SSID]: radio button and type the network name.b.If you are within range of your wireless access point, choose the Select from available network list radio button and then select Refresh to cause the MDI 2 to search for wireless network signals. The detected networks are displayed in the Network Name box.
10. After you have entered the network name, select Configure.11. Enter the security settings thatare required by your network, then select Next.
12. Select Yes to reconfigure your OBD2 Scanner MDI 2, or if you want to start over select No.
13. Choose the Properties tab to verify that the MDI 2 is configured correctly. You can also disconnect the USB cable to verify that the wireless connection is working.
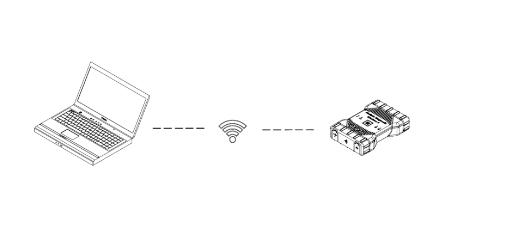
14. Record or print your settings as they are displayed on the Properties tab for future reference.Enabling Point-to-Point Wireless CommunicationYour MDI 2 will initiallybe configured for Point-to-Point Wireless Communicationon the PC you are connected to. Before starting, please verify your MDI 2kit is the Wireless-Point-to-Point kit 8200171 (Bosch p/n 1699200171)which includes the MDI 2 assembly with twoD-Link Wireless 802.11n USB Adapters.The illustration below shows a single MDI 2connected to a laptop PC using Point-to-Point Wireless communication.
Enabling Point-to-Point Wireless CommunicationYour MDI 2 will initiallybe configured for Point-to-Point Wireless Communicationon the PC you are connected to. Before starting, please verify your MDI 2kit is the Wireless-Point-to-Point kit 8200171 (Bosch p/n 1699200171)which includes the MDI 2 assembly with twoD-Link Wireless 802.11n USB Adapters.The illustration below shows a single MDI 2connected to a laptop PC using Point-to-Point Wireless communication
If you need to re-configure Point-to-Point on your MDI 2, use the following procedure. Note that the steps presented below assume you are running the Windows 7 operating system on your PC. The steps for other versions of the Windows operating system may be slightly different.
1.Insert the Wireless USB adapter in an available USB port on your PC. Do not plug the wireless adapter into a USB hub. Power-on your PC.
2.Connect the MDI 2 to your PC using the USB cable and allow the MDI 2 to boot completely. Do not plug the MDI 2 USB cable into a USB hub.
3.Start the MDI Manager software by double-clicking the icon on the PC desktop.
4.The Point-to-Point connection isautomatically configured. Wireless communication will be available when you are powered through the DLC Cable.If you have the need to reset your Point-to-Point passphrase, you can use the following steps.
The following steps assume you are running the Windows 7 operating system on your PC
1.On the right-hand side of the Windows Task Bar, click the View Wireless Networks button. A list of the available wireless networks in range of your PC is displayed.
2.Select Open Network and Sharing Center.
3.Select Manage Wireless Networks from the left column.
4.Select Change adapter menu and choose MDI from the list.
5.Remove your stored Point-to-Point network. The name will contain MDI and the last 8 digits of the MDI 2 serial number, (MDIXXXXXXXX).
6.When you reconnect the MDI 2 to the PC using the USB cable, a new passphrase will be established.
Set Factory Default
Selecting the Set Factory Defaultbutton on the Network Setup tab reconfigures your MDI 2to the Point-to-Point communications settings it had when it left the factory. Any software upgrades that have been installed to the MDI 2are still installed. When the car diagnostic scanner MDI 2 reset is finished, the MDI Manager software displays the MDI 2Explorer tab.All wireless AP configurations will be lost.


Leave a Reply